Ceiling Tiles
Backsplash Tin Tiles requires 6" patterns to accomodate a typical 18" height backsplash. The Nailup panel is used for this application utilizing a construction adhesive (i.e. Liquid Nails and/or AcrylPro) to adhere the panels to the wall. Backsplash tin can be cleaned using soap and water, and is suitable for spaces that produce high temperatures.
Instructions.Things You'll Need:
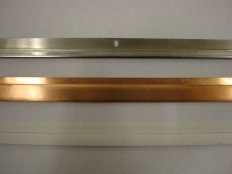
Sandpaper Pressed tin sheets
Safety glasses Gloves
Tin snips Drill
Foil tape Liquid nails
Wet rag
1. Clean the wall where the backsplash will be installed. Check for bumps and dips on the wall. Sand off and bumps and fill dips with drywall compound. Then sand the entire wall with a medium grit sandpaper to help with adhesion.
2. Measure the area to be covered and transfer that measurement to the back of your tin sheet. Use the factory edge as the bottom and the cut edge as the top that will fit flush against the cabinets. Cut the sheet with tin snips, using the points to keep a nice smooth edge. Try not to bend the sheet while cutting or moving, as the bends will be hard to keep down on the wall while the adhesive dries.
3. Measure for outlets or switches that may be on the wall. Transfer those measurements to the fitted sheet. Use a drill to make several holes along one line and then use the snips to cut out the openings. The outlet covers will cover these cuts.
4. Spread adhesive along the back of the panel. Run a continuous bead about an inch from the edges. Pick the panel up and fit onto the wall. This is best done with two people. Press into place and hold for a few minutes while the adhesive sets. Use foil tape to hold down any edges or corners while the adhesive sets.
5. Apply a second panel if needed and slightly overlap the seams. Run a bead of adhesive near the edge of the overlapping piece. Wipe away any squeezed-out adhesive right away with a wet rag. Then place foil tape on the seam to keep it together tight until the adhesive sets.
6. Run a bead of clear silicone caulk along the bottom of the panel where it meets the countertop. Any decorative 1/2 inch wood trim can be used over an end of the panel if it's an open wall.
.
- Protecting Unfinished Material
for protection and best results.
- Painting your Ceiling

#103 Nailup, Washington Color
Made in the USA
MetalCeilingExpress
Call Us:
941-723-2288
Pattern # 116, Nailup, Velvet Brown